Flies and horses go together like champagne and bubbles; you can’t have one without the other. Sometimes the flies are a minor nuisance, and sometimes they come in hordes, cause eye infections, or bite chunks out of the horse’s haunch. Fly spray can protect the horse, for a while, anyhow. Some horses will stand nicely for application from a spray-bottle; other horses are quite certain the sound and sight of the spray bottle is death itself coming to get them and will not stand quietly. And by not stand, I mean, rear, bolt, kick, spin and all other physically possible movements.
For those reactive horses, or for the areas around the face where you can’t spray easily, there are fuzzy fleece mitts lined with plastic, to apply the repellent by hand. These cost between 4 and 17 dollars. They eventually get grossly dirty from the oily spray and the dusty horse, or they wear out. Or, if you are like me, you lose them somewhere in a dark corner of the tack room or horse trailer.
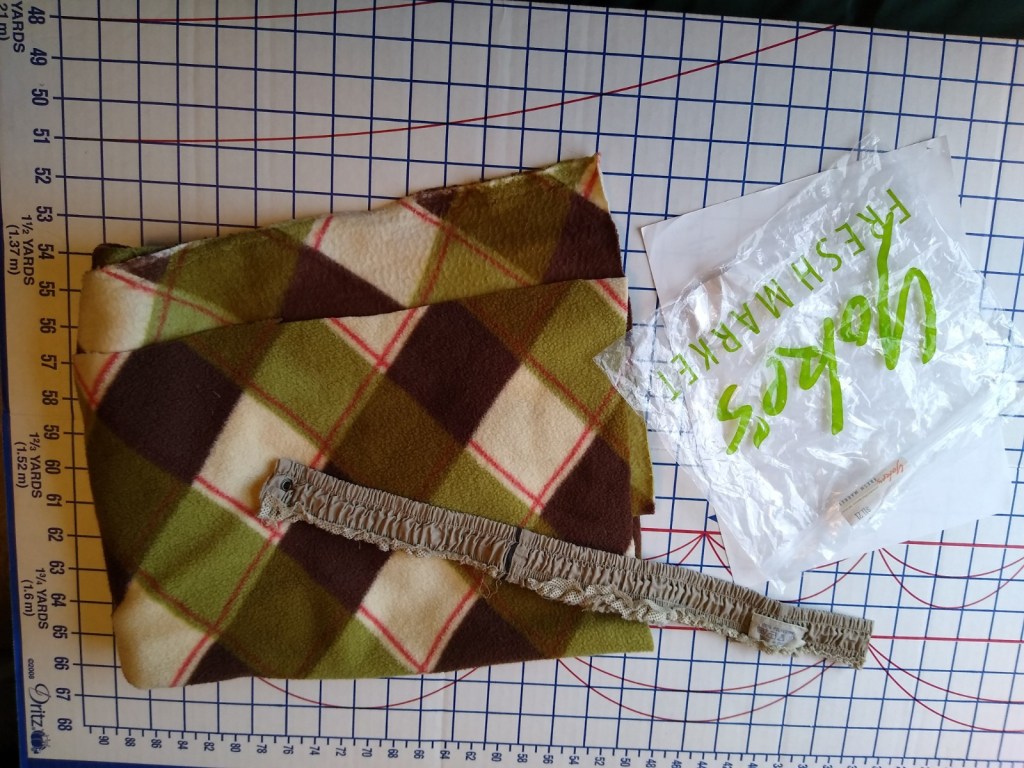
A friend and I were discussing how to make fly mitts for free. All you need is: 1) A sewing machine (preferably a vintage machine because they are the coolest); 2) a sturdy medium-sized plastic bag (preferably washed out and re-used) that is wide enough to spread your hand out in, and deep enough to reach over your wrist; 3) a scrap piece of gathered waistband from a worn out clothing item, or a piece of elastic; and, 4) a piece of scrap fleece, or an old towel, large enough to make a cover over the plastic bag. That’s it.
To make the applicator mitt, fold the material, and using the fold as one side, cut out the material about ¼ inch larger than the plastic bag on all sides (don’t cut through the fold). Determine which side is the bottom of your mitt. Sew the old stretch waistband to the bottom of the material, pulling and stretching the band out as you sew, so that it will be gathered and narrower than the top when finished. Then sew up the remaining side and top seams. I used a narrow zig zag stitch, to allow a tiny bit of stretch to the seam.
If you are using elastic instead of re-using a waistband, make the bottom side of your cover material about 1.5 inches longer. Sew top and side seams of cover first, then fold up a casing for your elastic, at least ¼ inch wider than the elastic. Sew along the edge of this folded hem, leaving about a 1-inch gap in the seam. Measure out the length of elastic to fit comfortably over your wrist. Use a large safety pin to thread the elastic through the casing. Sew elastic ends together. You can then sew together the one-inch gap in the seam, or if you are lazy like me, just leave it open. It won’t be obvious from the outside.
Once the fleece cover is done, simply push the sturdy plastic bag inside. If some of the plastic bag is hanging out, that’s even better because it protects your skin from the spray. You may want to add a safety pin or two to affix the bag to the fleece. Take it outside, apply the spray to the mitt, and rub the spray on the horse. Once the mitt has the oily spray on it, you can store it in a larger gallon size Ziploc bag—washed out and re-used, of course.

So, now it’s done. You can do it, too. If at the end you look at the mitt and think, “Is it not beautiful?” As in, it looks a little funky and your seams are crooked, don’t worry. My second mitt, in particular, has some imperfections. That’s because I thought I needed pull my other vintage machine out for some exercise, and for some reason, the zigs were not zagging consistently. But no one will notice once I turn it right-side out. And the horses are not perfectionists about zig zags, they just want the flies to go away.
The cover should be washable (though maybe outside in a bucket, since fly spray is usually strongly scented), and the internal plastic bag can be replaced if it wears out.
Reduce. Reuse. Re-apply the repellent as needed.
Of course, I needed to test my two prototypes. I gave one to my horsey friend Levi and asked him to review the product. He gave it a “two hooves-up” and stated, “Anything that keeps my human from spraying that icky fly spray directly into my face is a good thing.”
I queried my own horse, Vali, about his thoughts on the mitt. While he thought it was effective for application of fly spray, he recommended not using crinkly plastic for the inside lining. When he hears plastic crinkling, he thinks it is a granola bar wrapper being undone, and it should be shared with him. He was disappointed to discover that the fly mitt did not come with a treat. Therefore, he rated it only one head-toss.
Regarding my own thoughts on the mitt, I thought my bag should be longer, or it should be safety pinned to the edge of the mitt. The inner bag keeps squishing up inside. So far I’m living with that problem, because I have not managed to remember to bring two safety pins out to the horse trailer where the mitt is currently living. Knowing my memory skills, it may never happen.
Nonetheless, despite the criticisms, the fly mitts are working fine. On my last mountain ride, I had 20 mosquito bites on my lower leg, and no obvious bites on my horse. I should have applied the spray to myself. Or maybe worn armor. Hmmm. I wonder what I can upcycle into mosquito armor?
